Tuesday 14 November 2017

Using UWP to design your Forms app - Part 2 - ListViews

One of the most common forms of UI element used within Forms is the ListView. In this blog, we'll be using the UWP XAML designer to create a forms ListView. I'm not going to deal with the data binding of the list as there are plenty of code examples of that.

The main differences

The biggest difference between the Forms XAML and UWP XAML for ListView is the DataTemplate. UWP has a ListViewItem which encapsulates all of the objects required for the list view. In Forms, we need to define both the ListView.ItemSource, DataTemplate and then the ViewCell itself. Once that's done though, porting between the two versions of XAML is pretty straight forward.

The UWP Code

The UWP code we will be using looks like this

<Grid Background="{ThemeResource ApplicationPageBackgroundThemeBrush}">
        <Grid.RowDefinitions>
            <RowDefinition Height="40"/>
            <RowDefinition Height="*"/>
        </Grid.RowDefinitions>
        <TextBlock HorizontalAlignment="Center" Grid.Row="0" Text="A most excellent listview" TextWrapping="Wrap" VerticalAlignment="Center"/>
        <ListView HorizontalAlignment="Stretch" Grid.Row="1" Grid.RowSpan="2" VerticalAlignment="Stretch" Background="Aquamarine">
            <ListViewItem Margin="4">
                <Grid>
                    <Grid.RowDefinitions>
                        <RowDefinition Height="*"/>
                        <RowDefinition Height="*"/>
                    </Grid.RowDefinitions>
                    <Grid.ColumnDefinitions>
                        <ColumnDefinition Width="60"/>
                        <ColumnDefinition Width="*"/>
                    </Grid.ColumnDefinitions>
                    <Image Grid.Column="0" Source="Assets/contact.png" Width="48" Height="48" HorizontalAlignment="Center" VerticalAlignment="Center" Grid.RowSpan="2"/>
                    <TextBlock Grid.Column="1" Grid.Row="0" Text="Line 1" Foreground="Violet"/>
                    <TextBlock Grid.Column="1" Grid.Row="1" Text="Line 2" Foreground="Blue"/>
                </Grid>
            </ListViewItem>
        </ListView>
    </Grid> 


This will give a ListView which looks like this


As we saw from the last instalment, this won't work directly on Forms.

To get it to work, copy the Grid (and contents) to the Forms ContentPage and place in-between the ContentPage.Content tags.

Using copy and paste, replace


FromTo
TextBlockLabel
HorizontalAlignmentHorizontalOptions
VerticalAlignmentVerticalAlignment
WidthWidthRequest (*)
HeightHeightRequest (*)
ForegroundTextColor
BackgroundBackgroundColor
TextAlignmentLineBreakMode

(*) except within the Row or ColumnDefinitions

Next remove Assets/ from the Image source property

Dealing with the data template

As has previously been said, the ListViewItem does not exist directly within Forms. Forms requires the ItemTemplate, DataTemplate and the ViewCell. To do that, remove the ListViewCell line and replace with

<ListView.ItemTemplate>
     <DataTemplate>
          <ViewCell>  


(Remember, you will need close these after the content of the ViewCell has been completed)

The construct looks like this

<ListView.ItemTemplate>
     <DataTemplate>
          <ViewCell>
               <Grid>
                    <Grid.RowDefinitions>
                         <RowDefinition Height="*"/>
                         <RowDefinition Height="*"/>
                    </Grid.RowDefinitions>
                    <Grid.ColumnDefinitions>
                         <ColumnDefinition Width="60"/>
                         <ColumnDefinition Width="*"/>
                    </Grid.ColumnDefinitions>
                    <Image Grid.Column="0" Source="contact.png" WidthRequest="48" HeightRequest="48" HorizontalOptions="Center" VerticalOptions="Center" Grid.RowSpan="2"/>
                    <Label Grid.Column="1" Grid.Row="0" Text="Line 1" TextColor="Violet"/>
                    <Label Grid.Column="1" Grid.Row="1" Text="Line 2" TextColor="Blue"/>
               </Grid>
           </ViewCell>
     </DataTemplate>
</ListView.ItemTemplate>  


A bit more work, but at the same time, we know that the template will be correct as we've already defined it and been able to see the result.

Conclusion

It's not difficult to move a ListView between UWP and forms. Once we have done the search and replaces to change UWP property names to Forms property names, most of the rest falls into place.
Sunday 12 November 2017

Using UWP to create your Xamarin Forms XAML

One of the biggest pains in the backside for Forms is that there isn't a UI designer. While you can use the live previewer or the (far better) Gorilla Player, you can't actually drag and drop UI elements into the XAML on your Forms app.

Now, Visual Studio (on the PC) allows you to design UIs for UWP using standard drag and drop techniques. The only problem is that Forms XAML is not the same as UWP XAML which is fine as Forms is an abstraction UI layer designed so that a common UI element can be used across all supported platforms.

It is possible though to use the UWP designer to create you Forms XAML, but it's not completely straight forward.

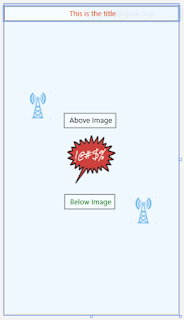
Let's create our basic UI.


There is nothing special about this - we have a couple of graphics, some text and some positioning. The XAML in UWP looks like this

<Grid Background="{ThemeResource ApplicationPageBackgroundThemeBrush}">
        <Grid Background="AliceBlue">
            <Grid.RowDefinitions>
                <RowDefinition Height="40"/>
                <RowDefinition Height="*"/>
            </Grid.RowDefinitions>
            <TextBox Text="This is the title" TextAlignment="Center" Grid.Row="0" VerticalAlignment="Center" HorizontalAlignment="Center" Foreground="#FFEC5319" />
            <Grid HorizontalAlignment="Center" Height="300" Grid.RowSpan="2" VerticalAlignment="Center" Width="300">
                <Image HorizontalAlignment="Center" Height="100" VerticalAlignment="Center" Width="100" Source="Assets/contact.png"/>
                <TextBox HorizontalAlignment="Left" Margin="100,54,0,0" Text="Above Image" VerticalAlignment="Top" Foreground="Black"/>
                <TextBox HorizontalAlignment="Left" Margin="100,221,0,0" Text="Below Image" Foreground="Red" VerticalAlignment="Top"/>
                <Image HorizontalAlignment="Left" Height="61" Margin="230,228,0,0" VerticalAlignment="Top" Width="54" RenderTransformOrigin="-0.019,-0.027" Source="Assets/broadcast.png"/>
                <Image HorizontalAlignment="Left" Height="61" Margin="13,12,0,0" VerticalAlignment="Top" Width="54" RenderTransformOrigin="-0.019,-0.027" Source="Assets/broadcast.png"/>
            </Grid>
        </Grid>
    </Grid>

Nothing amazing, but it won't work in Forms; a lot of this isn't available in forms.

If create a basic Forms app with XAML for the UI, create a new ContentPage and copy the above code in-between the ContentPage.Content tags. If you fire up the previewer of choice, you'll notice nothing showing other than errors.


With the aid of search and replace, we can get this to work on Forms

Change TextBox to Label
Height and Width has to become HeightRequest and WidthRequest. While Height and Width are available on Forms, they are read-only properties
Remove Assets/ from the Source property on the Image
Foreground becomes TextColor. Similarly, Background becomes BackgroundColor
Vertical and HorizontalAlignment becomes Vertical and HorizontalOptions
There isn't a Vertical or Horizontal property value called Top or Left. Both need to be Start

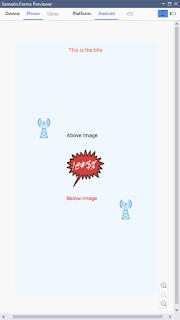
At this stage we should have a UI


Very similar the original, but the title position is incorrect and the margin positions aren't quite right.

Change the HorizontalOptions to Center for the top Label
Manually alter the margin positions. The live viewer will help here

The UI should finally look like the original


Dealing with the graphics

We have an issue with UWP which we don't have with iOS an Android and that is where the graphics are. On Android, graphics must be in one of the Resources/drawable directories with iOS normally using the Resources directory. If you have the line

<Image Source="contact"/>

Forms will interpret this on the platform to use the default directory. On UWP the images can be held anywhere, so Forms points to either the base of the source or Assets, but there isn't a guarantee of either being used.

To ensure we have the source pointing to the correct directory, we will need to create a helper which we bind to the Source via the aid of a Helper directive in the XAML

Create a directory called Converters. In there, create a file called CorrectFilepath.cs and add the following code

public class CorrectFilepath: IValueConverter
    {
        public object Convert(object value, Type targetType, object parameter, CultureInfo culture)
        {
            var para = (string)parameter;
            return Device.RuntimePlatform == Device.UWP ? $"Assets/{para}" : para;
        }

        public object ConvertBack(object value, Type targetType, object parameter, CultureInfo culture)
        {
            throw new NotImplementedException();
        }
    }


If you use a different directory to Assets on UWP, just replace the Assets with the path to the new directory for images

Next, we need to add a dictionary entry to the Forms XAML file

Add the following to the <ContentPage definition

xmlns:helpers="clr-namespace:UWPXaml.Converters;assembly=UWPXaml"

Finally, create a resource directory. To do that, directly under the ControlPage and before the ControlPage.Content, add the following

    <ContentPage.Resources>
        <ResourceDictionary>
            <helpers:CorrectedImageHelper x:Key="Source" />
        </ResourceDictionary>
    </ContentPage.Resources>

To use it, we change the Image Source property to be

Source = "{Binding Converter={StaticResource Source}, ConverterParameter=broadcast}"

Compile and run!

Conclusion

It's not impossible to use the UWP designer for Forms, but we will have to do some donkey work to get it running.

Next time, we'll do more of the same, but with ListViews